Integration with Facebook(META): відмінності між версіями
Перейти до навігації
Перейти до пошуку
Немає опису редагування |
Немає опису редагування |
||
| Рядок 60: | Рядок 60: | ||
# '''Our Meta Pages appeared in the table''' | # '''Our Meta Pages appeared in the table''' | ||
---- | ---- | ||
=Message= | |||
*To view messages received from Facebook or Instagram clients, follow the steps shown in the screenshot. | |||
[[Файл:Facebook new12.png|1450px|безрамки]] | |||
* Click on '''CRM''' | |||
# Click on '''Messages''' | |||
# Click on '''Guests''' | |||
# '''Leave the filters set to Facebook/Instagram. ''' | |||
Версія за 09:36, 17 липня 2025
- Connecting a CRM to Facebook Messenger is quick and easy — just follow all the steps outlined in our setup guide.*
- To get started, you’ll need an MVC HMS account, a personal Facebook profile, and a connected Facebook Business account.*
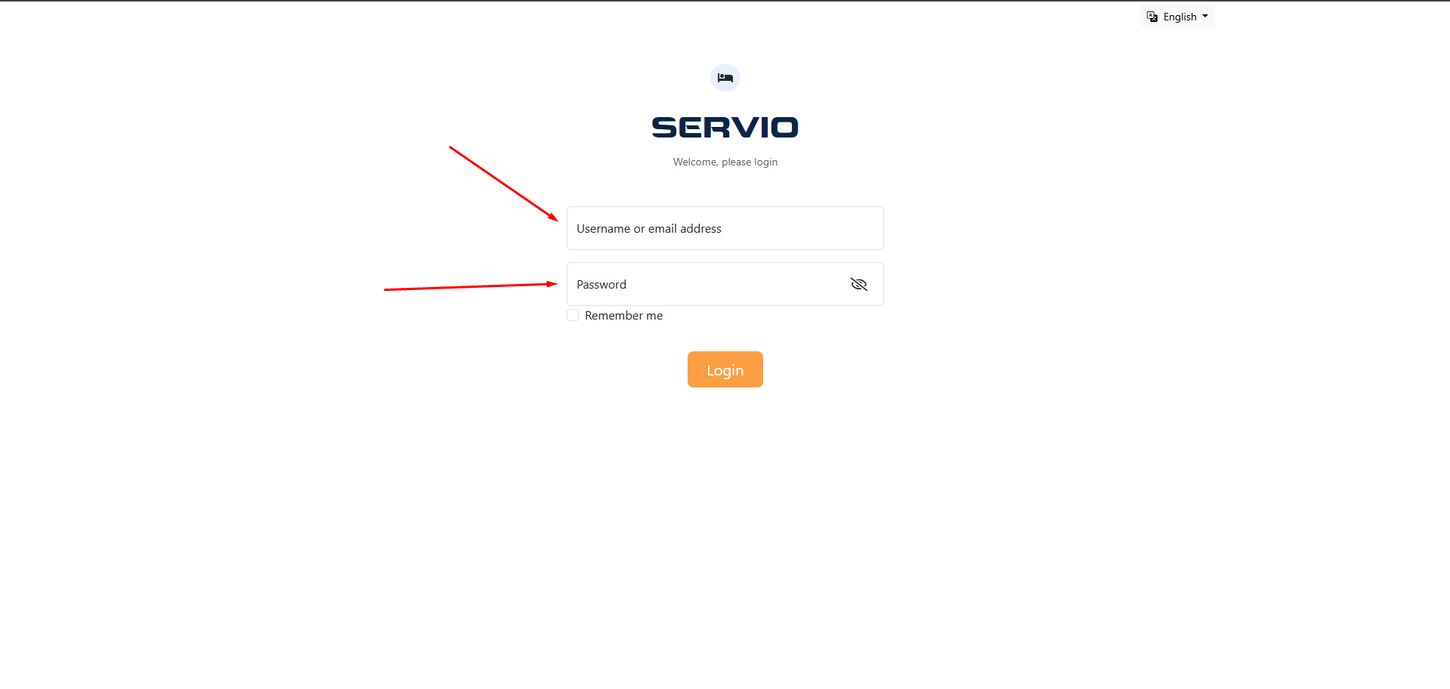
Login to HMS
- Go to HMS Login Page and enter your login credentials into the form fields.
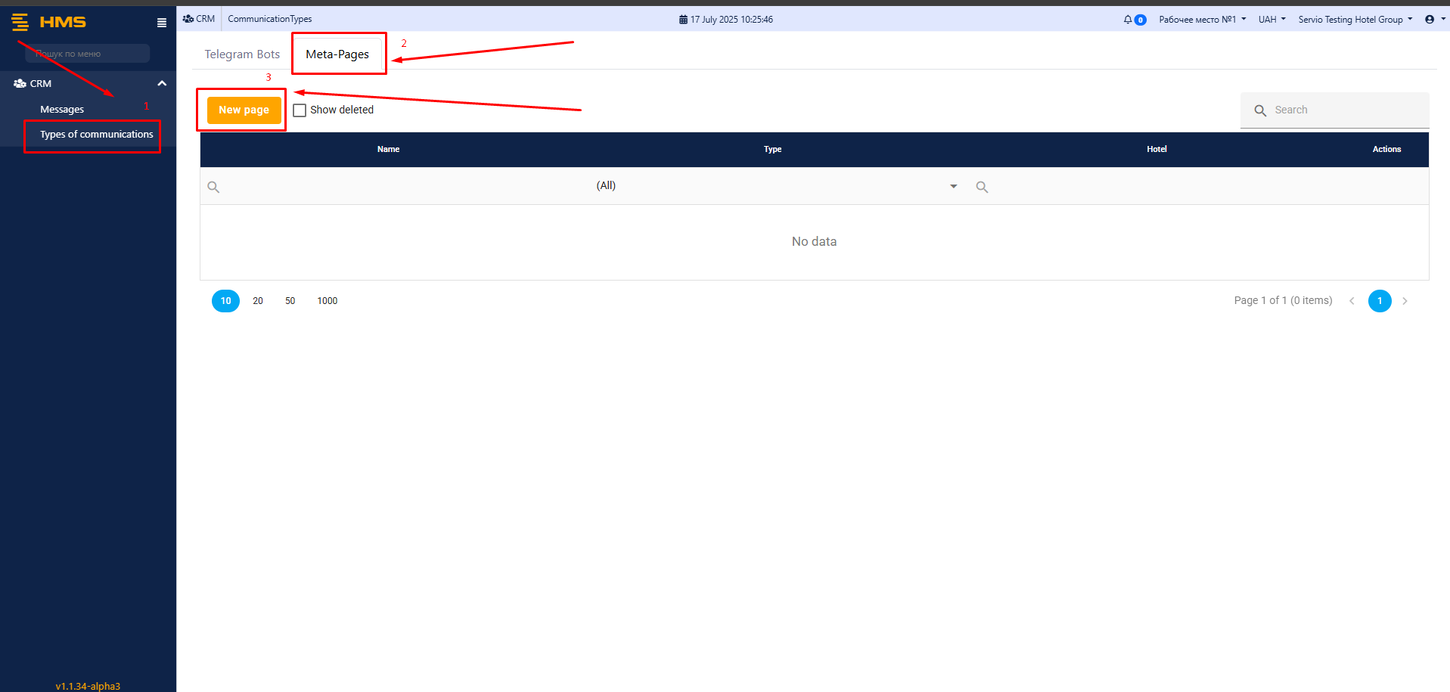
Add Meta Page
- Follow the steps shown in the screenshot:
- Click on CRM
- Click on Types of communication
- Click on Meta-Pages
- Click on New Page
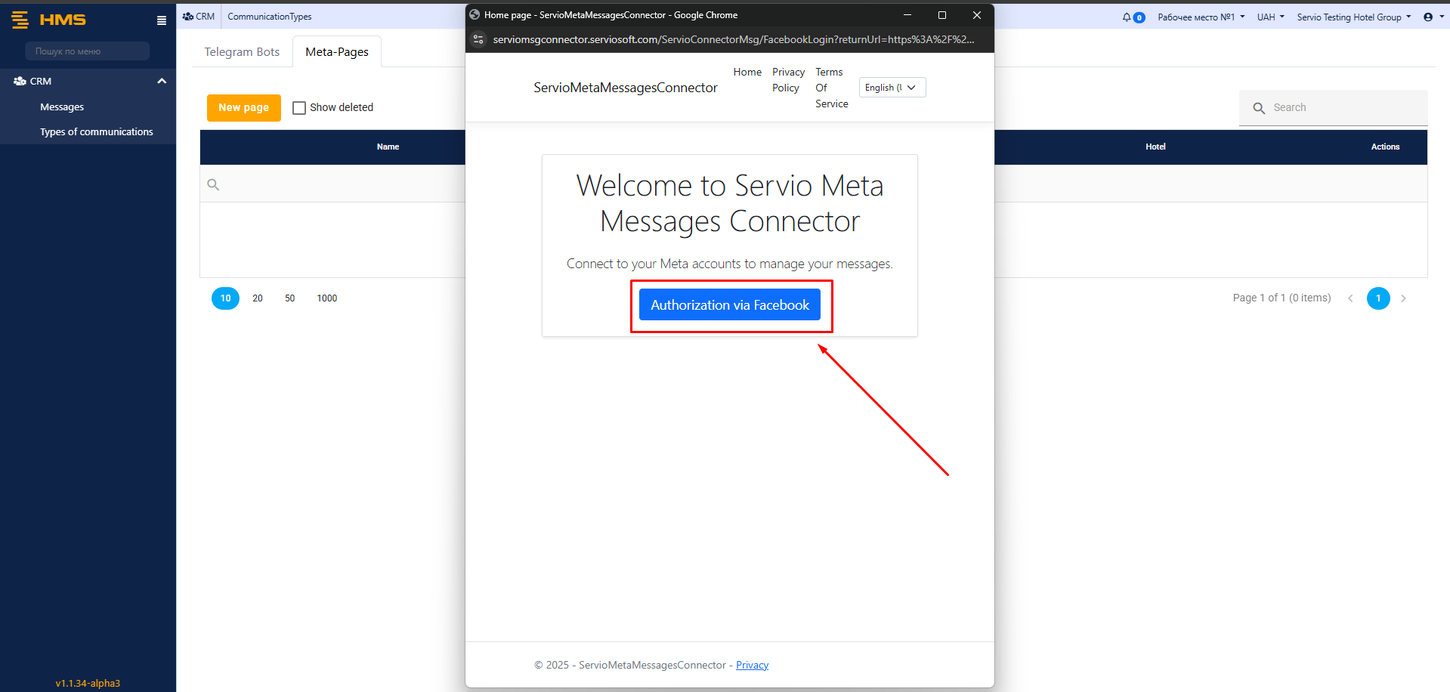
Facebook Authorization
- A new pop-up window will appear where you need to log in with your Facebook account.
- Click on the Authorization via Facebook button
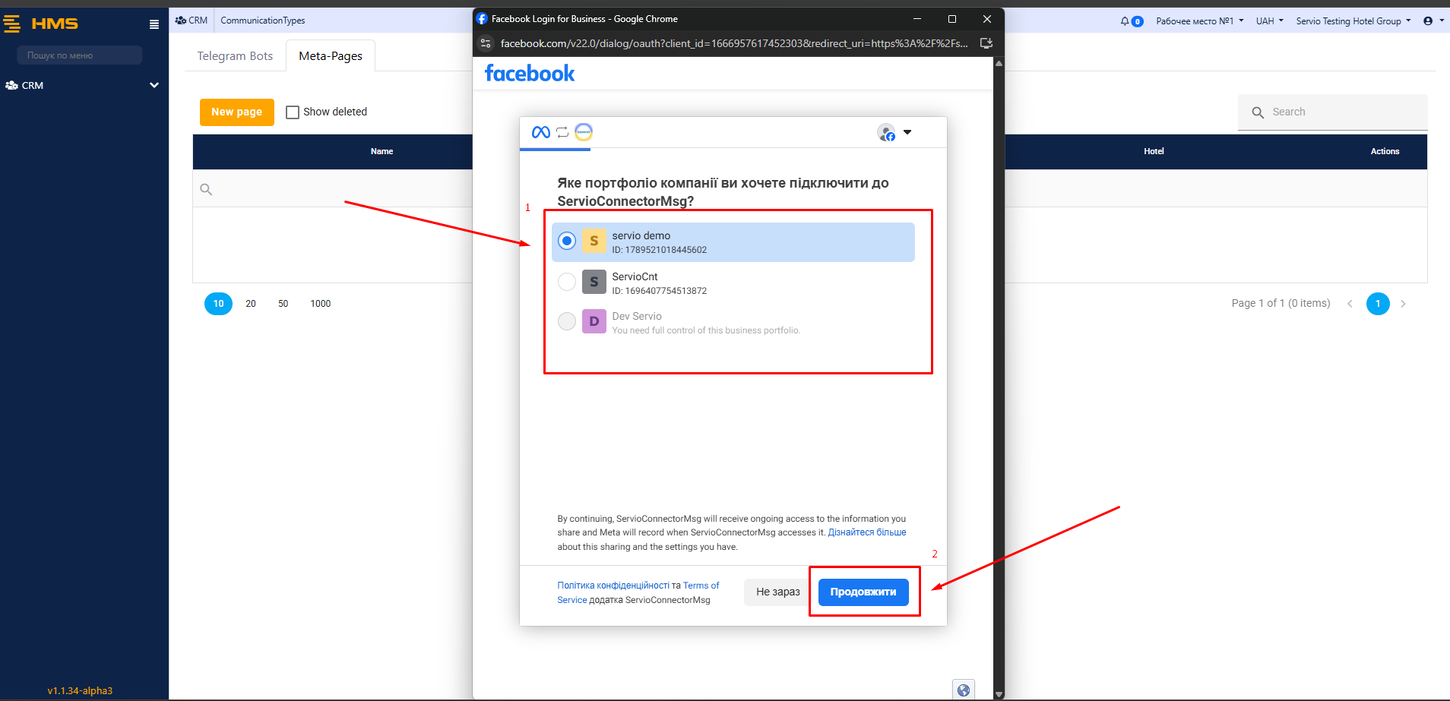
- Select the business portfolio you want to connect.
- Click on Continue.
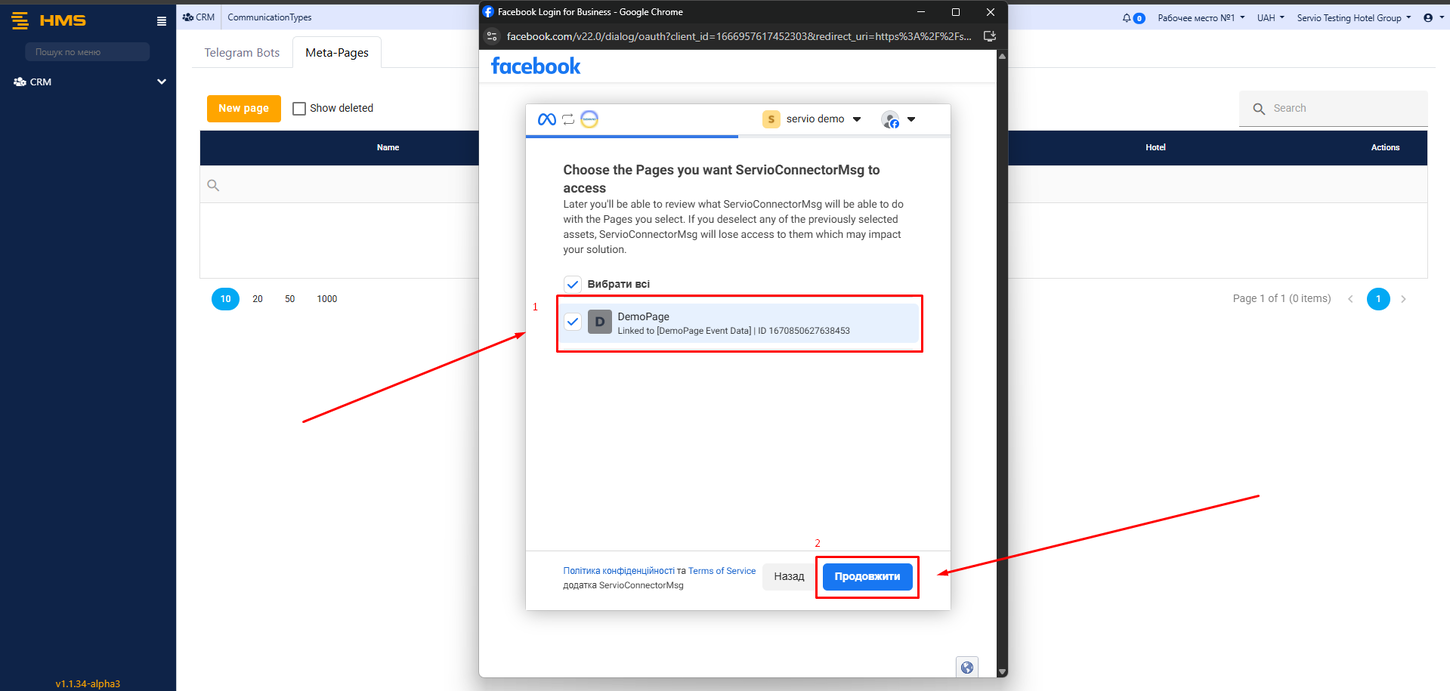
- Choose the Facebook Pages you want ServioConnectorMsg to access.
- Click on Continue.
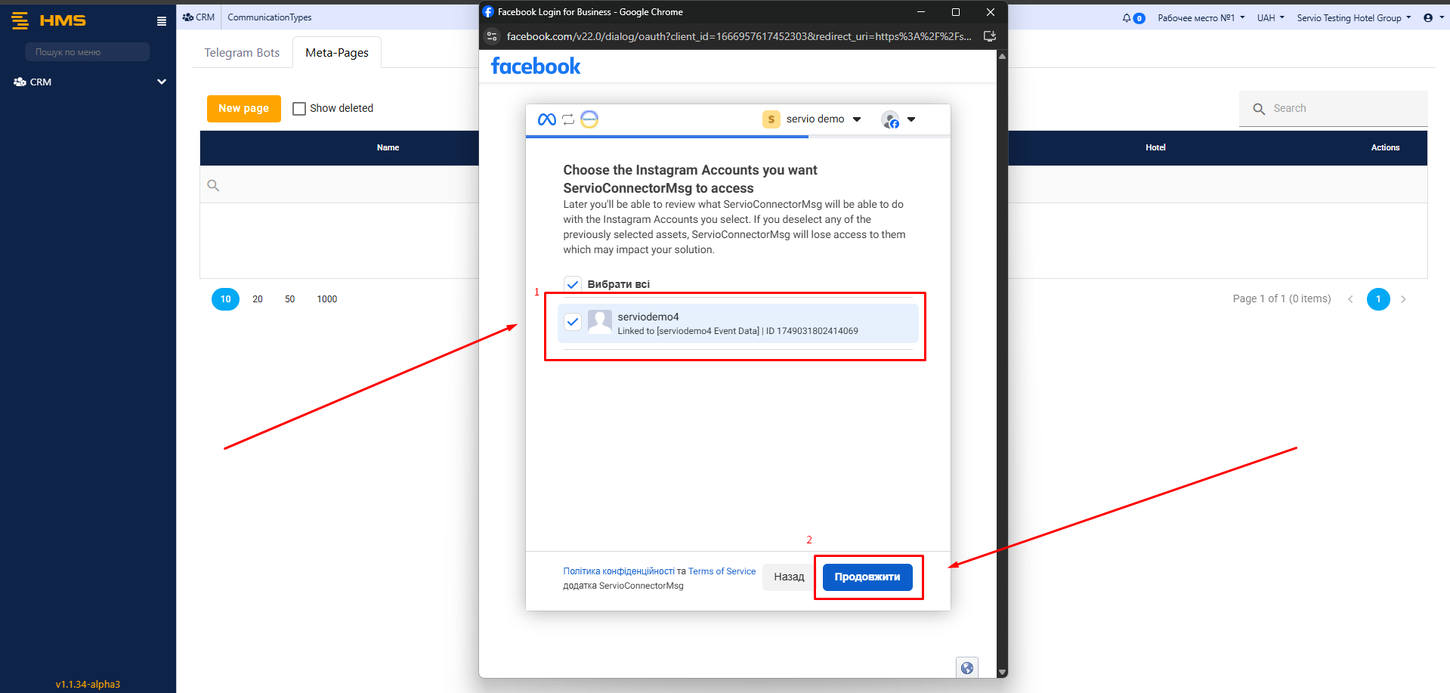
- Select the Instagram accounts you want ServioConnectorMsg to access.
- Click on Continue.
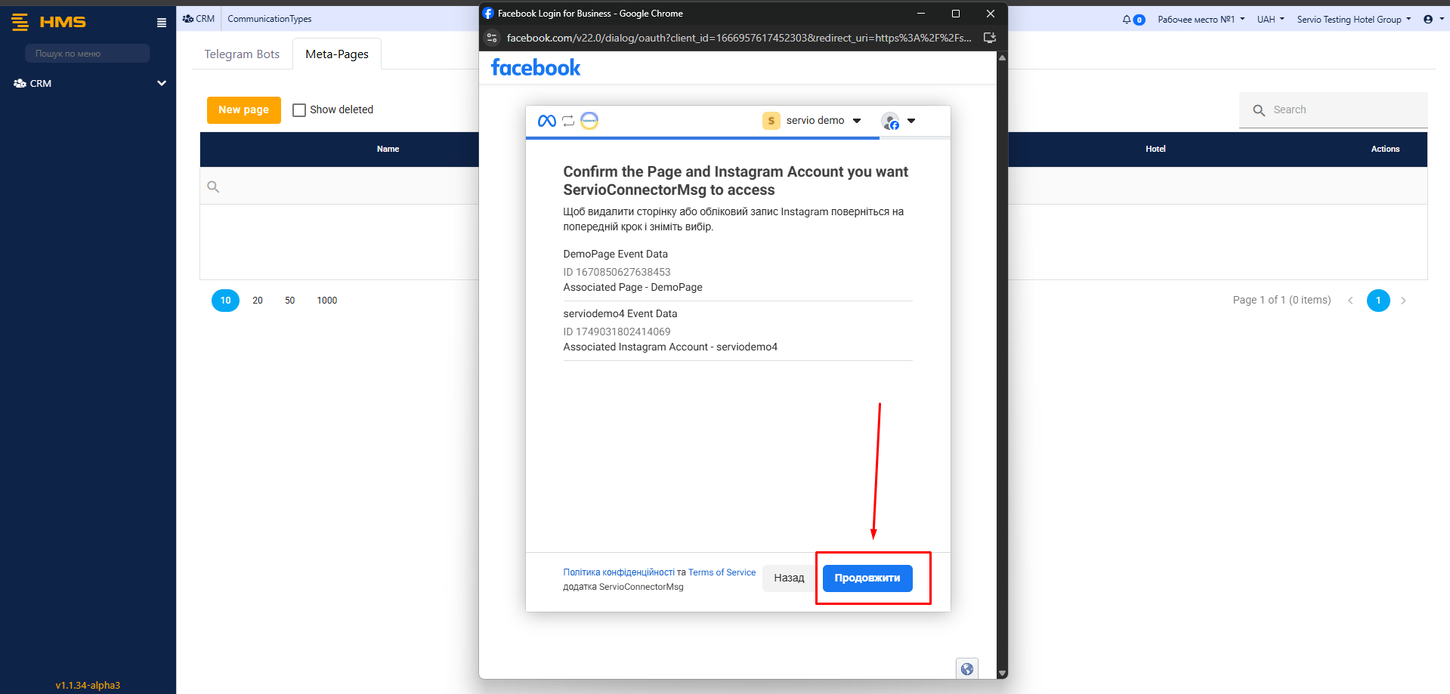
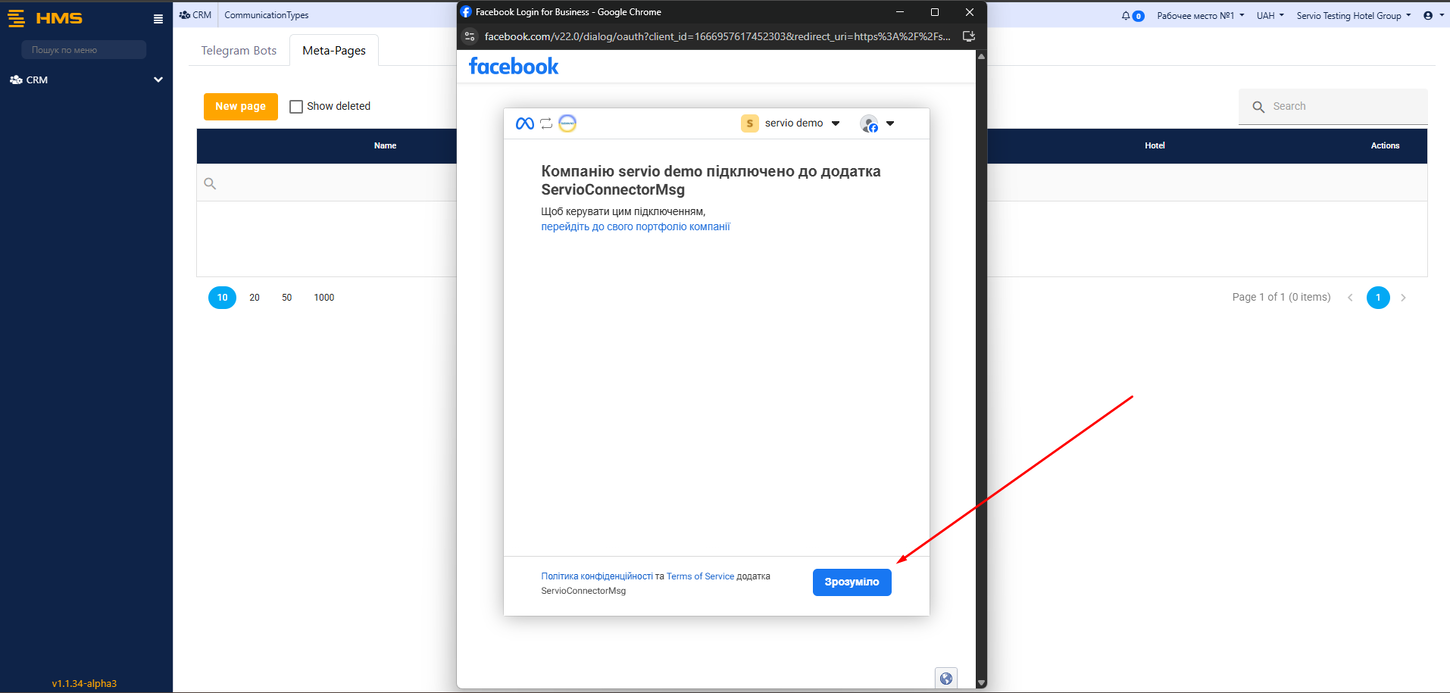
- Click on Continue.
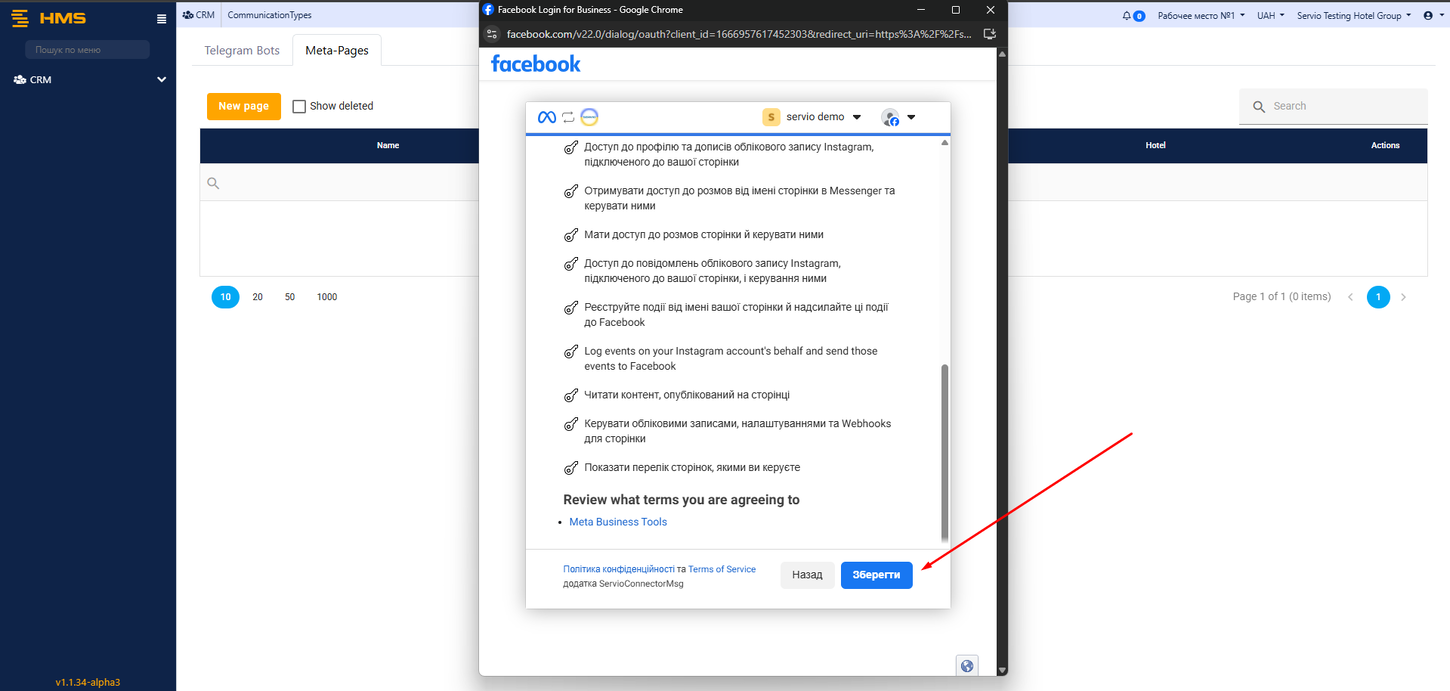
- Click on Continue.
- Click on Continue.
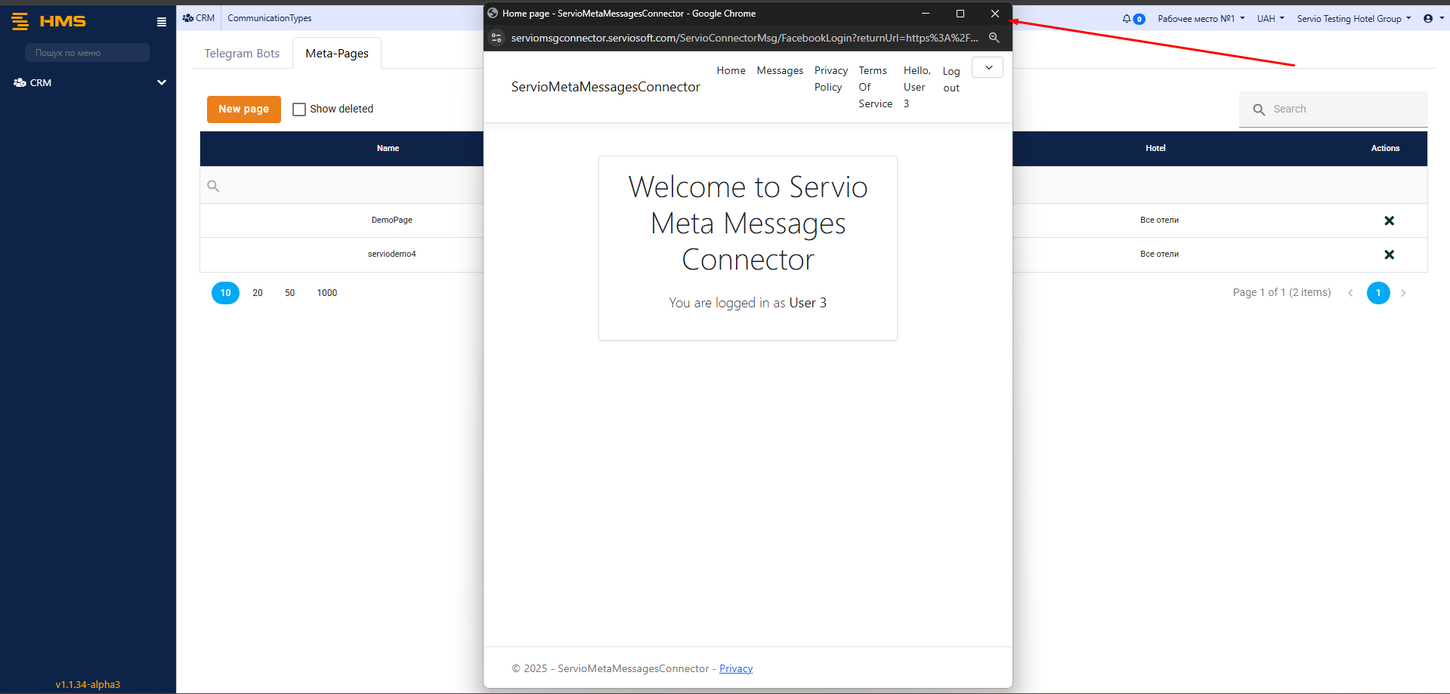
- Close the window.
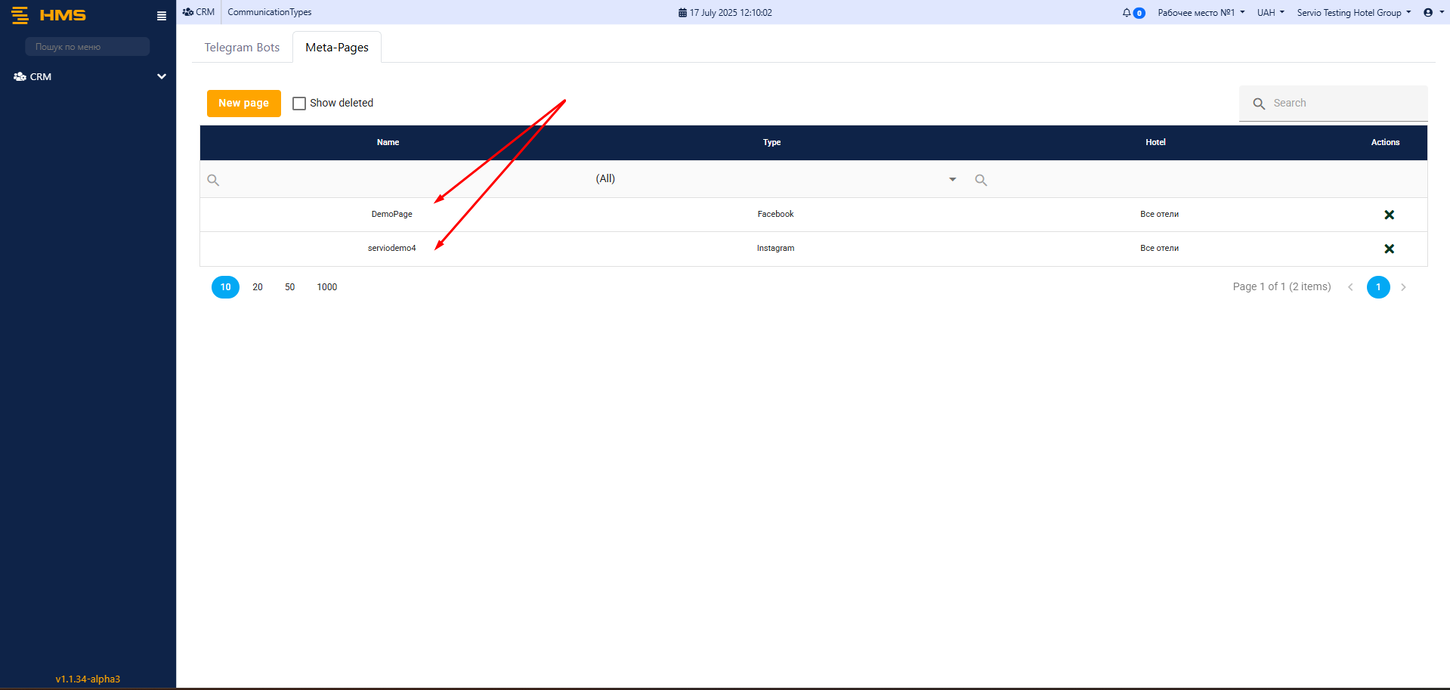
- Our Meta Pages appeared in the table
Message
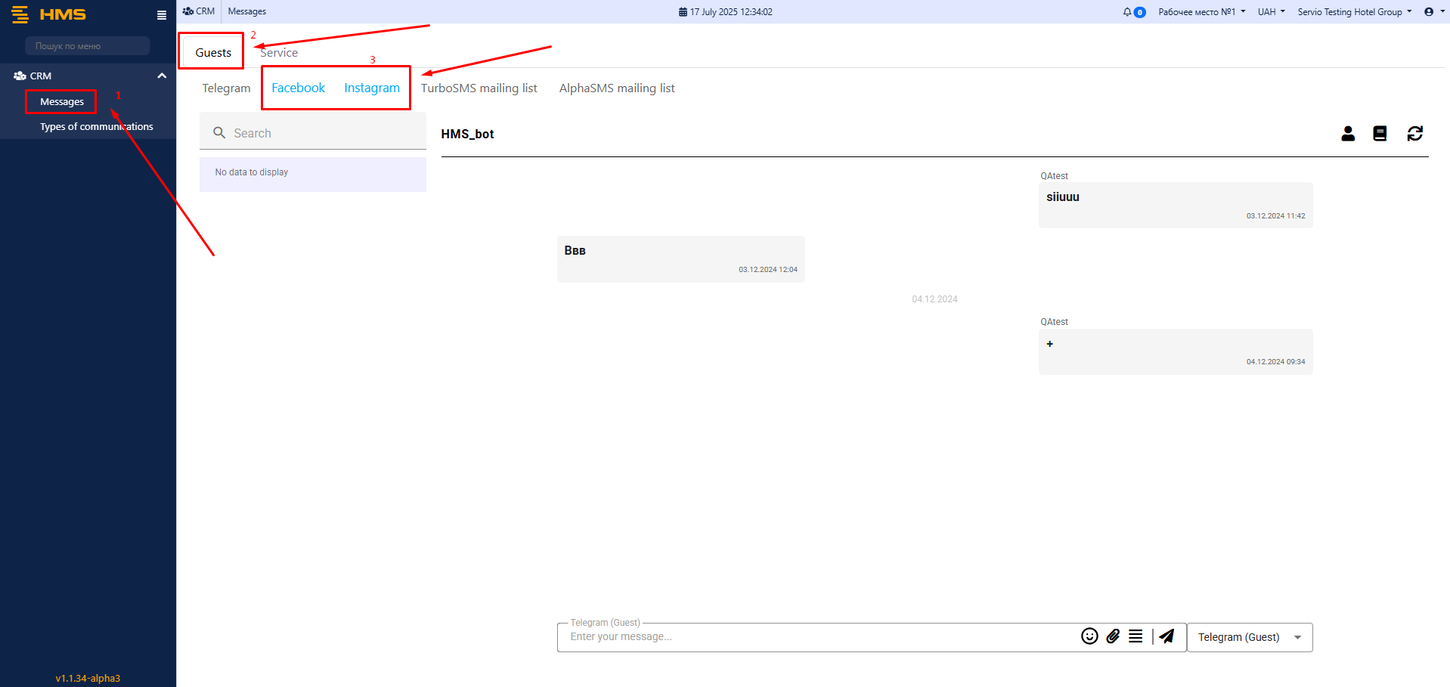
- To view messages received from Facebook or Instagram clients, follow the steps shown in the screenshot.
- Click on CRM
- Click on Messages
- Click on Guests
- Leave the filters set to Facebook/Instagram.
